Click for large image

1_Tony_Garrod.jpg

1 Tony Garrod.jpg

Click for large image

2_Connor_Essam.jpg

2 Connor Essam.jpg

Click for large image

3_Tony_flicks_the_ball_on.jpg

3 Tony flicks the ball on.jpg

Click for large image

4_Connor_heads_clear.jpg

4 Connor heads clear.jpg

Click for large image

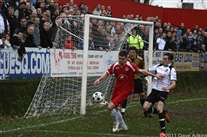
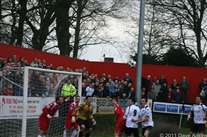
5_Matt_gets_to_the_by-line_but_his_pull_back_is_blocked.jpg

5 Matt gets to the by-line but his pull back is blocked.jpg

Click for large image

6_Danny_Harris.jpg

6 Danny Harris.jpg

Click for large image

7_The_Loanee_keeper_collects_before_Tony_cvan_get_his_head_to_the_ball.jpg

7 The Loanee keeper collects before Tony cvan get his head to the ball.jpg

Click for large image

8_A_splendid_turnout_from_the_Darts_fans.jpg

8 A splendid turnout from the Darts fans.jpg

Click for large image

9_Jon_lets_fly.........jpg

9 Jon lets fly.........jpg

Click for large image

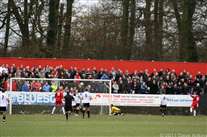
10_...and_the_keeper_is_happy_to_watch_it_go_wide.jpg

10 ...and the keeper is happy to watch it go wide.jpg

Click for large image

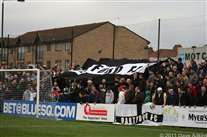
11_Jamie_tries_to_curl_the_free-kick_round_the_wall........jpg

11 Jamie tries to curl the free-kick round the wall........jpg

Click for large image

12_....but_Louis_is_there_to_collect_safely.jpg

12 ....but Louis is there to collect safely.jpg

Click for large image

13_Lee_Clarke_takes_the_penalty.......jpg

13 Lee Clarke takes the penalty.......jpg

Click for large image

14_...Louis_almost_gets_a_hand_to_it.....jpg

14 ...Louis almost gets a hand to it.....jpg

Click for large image

15_...but_it_s_in_1-0_Welling.jpg

15 ...but it's in 1-0 Welling.jpg

Click for large image

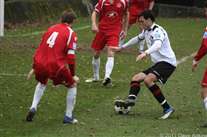
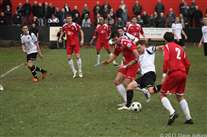
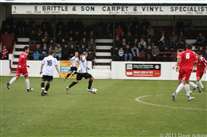
16_Tony_controls_as_3_Wing_s_players_close_in.jpg

16 Tony controls as 3 Wing's players close in.jpg

Click for large image

17_Tom__B__climbs_to_head_the_ball......jpg

17 Tom (B) climbs to head the ball......jpg

Click for large image

18_...but_it_s_wide.jpg

18 ...but it's wide.jpg

Click for large image

19_Danny_is_held_off_the_ball.jpg

19 Danny is held off the ball.jpg

Click for large image

20_How_is_that_NOT_a_penalty.jpg

20 How is that NOT a penalty.jpg

Click for large image

21_Elliot_tries_to_get_his_shot_off.jpg

21 Elliot tries to get his shot off.jpg

Click for large image

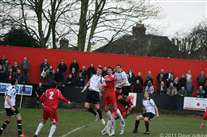
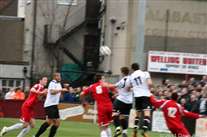
22_Once_again_Tom__B__climbs_to_head_the_ball.......jpg

22 Once again Tom (B) climbs to head the ball.......jpg

Click for large image

23_....is_it_going_in.......jpg

23 ....is it going in.......jpg

Click for large image

24_...no_-_it_s_headed_off_the_line.jpg

24 ...no - it's headed off the line.jpg

Click for large image

25_Flagzilla_makes_an_appearance.jpg

25 Flagzilla makes an appearance.jpg

Click for large image

26_Louis_gets_there_first.jpg

26 Louis gets there first.jpg

Click for large image

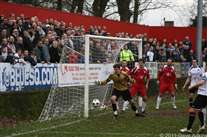
27_Elliot_forces_the_keeper_to_make_a_mistake.jpg

27 Elliot forces the keeper to make a mistake.jpg

Click for large image

28_Tom__C__is_down_after_getting_a_boot_where_he_didn_t_really_want_one......jpg

28 Tom (C) is down after getting a boot where he didn't really want one......jpg

Click for large image

29_...resulting_in_the_Wing_s_no7_getting_his_marching_orders.jpg

29 ...resulting in the Wing's no7 getting his marching orders.jpg

Click for large image

30_Tom__C__shoots........jpg

30 Tom (C) shoots........jpg

Click for large image

31_...but_it_s_an_easy_one_for_the_keeper.jpg

31 ...but it's an easy one for the keeper.jpg

Click for large image

32_Matt_shows_determination_as_he_heads_the_ball_forward.jpg

32 Matt shows determination as he heads the ball forward.jpg

Click for large image

33_Matt_is_brought_down_-_but_no_penalty.jpg

33 Matt is brought down - but no penalty.jpg

Click for large image

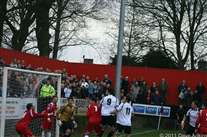
34_The_keeper_collects_under_pressure_from_Jon_and_Tom__B_.jpg

34 The keeper collects under pressure from Jon and Tom (B).jpg

Click for large image

35_The_Wings_shot_beats_Louis......jpg

35 The Wings shot beats Louis......jpg

Click for large image

36_....but_not_Elliot_on_the_line.jpg

36 ....but not Elliot on the line.jpg

Click for large image

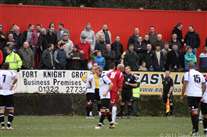
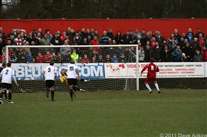
37_Another_Jamie_Day_free-kick_this_time_it_s_over_the_wall.......jpg

37 Another Jamie Day free-kick this time it's over the wall.......jpg

Click for large image

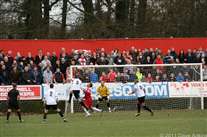
38_...but_Louis_gets_enough_on_it_to_tip_it_over_the_bar.jpg

38 ...but Louis gets enough on it to tip it over the bar.jpg

Click for large image

39_Another_safe_catch_from_Louis.jpg

39 Another safe catch from Louis.jpg

Click for large image

40_Tom__B__is_booked_for_what_I_can_only_assume_was_a_deliberate_hand_ball_-_leading_to_another_penalty_for_Welling.jpg

40 Tom (B) is booked for what I can only assume was a deliberate hand ball - leading to another penalty for Welling.jpg

Click for large image

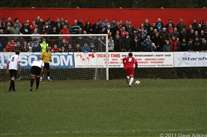
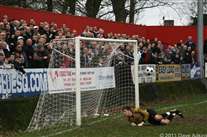
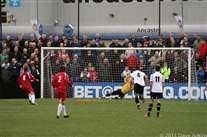
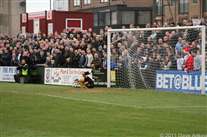
41_...Lee_Clarke_runs_up_to_take_the_penalty.....jpg

41 ...Lee Clarke runs up to take the penalty.....jpg

Click for large image

42_....But_Louis_saves.....jpg

42 ....But Louis saves.....jpg

Click for large image

43_...and_Connor_tidies_up.jpg

43 ...and Connor tidies up.jpg

Click for large image

44_Lee_gets_to_the_ball......jpg

44 Lee gets to the ball......jpg

Click for large image

45_...and_the_keeper_is_finally_beaten_1-1.jpg

45 ...and the keeper is finally beaten 1-1.jpg

Click for large image

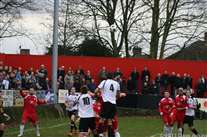
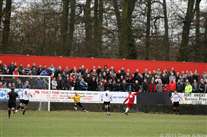
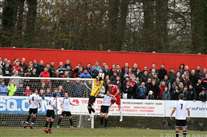
46_The_Wing_s_keeper_hardly_put_a_foot_wrong_all_afternoon.jpg

46 The Wing's keeper hardly put a foot wrong all afternoon.jpg

Click for large image

47_Adam_shoots_......jpg

47 Adam shoots ......jpg

Click for large image

48_...but_once_again_the_keeper_is_there.jpg

48 ...but once again the keeper is there.jpg

Click for large image

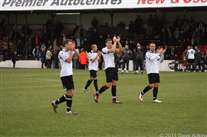
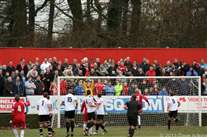
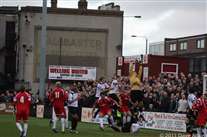
49_Tom_Ryan_Mattand_Adam_acknowledge_the_fans.jpg

49 Tom,Ryan,Mattand Adam acknowledge the fans.jpg