Click for large image

1_Danny_Harris.jpg

1 Danny Harris.jpg

Click for large image

2_Lee_B_aims_as_if_to_shoot.......jpg

2 Lee B aims as if to shoot.......jpg

Click for large image

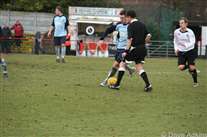
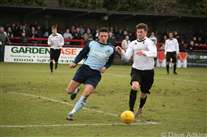
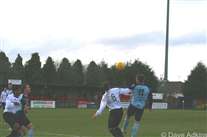
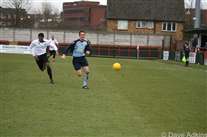
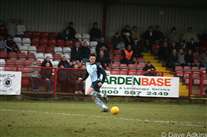
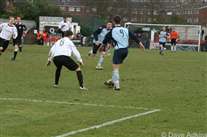
3_...but_changes_direction_after_the_defender_was_commited.jpg

3 ...but changes direction after the defender was commited.jpg

Click for large image

4_All_hands_at_the_back.jpg

4 All hands at the back.jpg

Click for large image

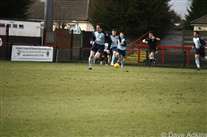
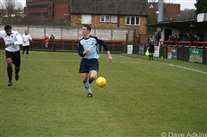
5_The_ref_waves_play_on_and_the_Darts_breakout.....jpg

5 The ref waves play on and the Darts breakout.....jpg

Click for large image

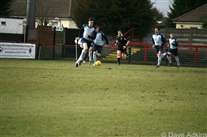
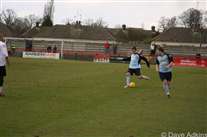
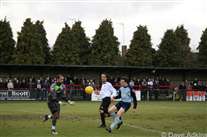
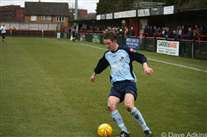
6_......Danny_heads_left_as_Elliot_brings_the_ball.jpg

6 ......Danny heads left as Elliot brings the ball.jpg

Click for large image

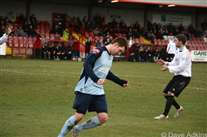
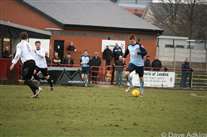
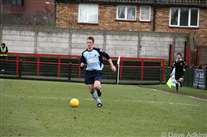
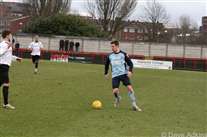
7_....Elliot_charges_on_with_Lee_B_for_company.....jpg

7 ....Elliot charges on with Lee B for company.....jpg

Click for large image

8_Elliot_heads_for_goal.jpg

8 Elliot heads for goal.jpg

Click for large image

9_Ryan_Johnson_sends_the_ball_over.jpg

9 Ryan Johnson sends the ball over.jpg

Click for large image

10_Lee_B_tries_for_goal......jpg

10 Lee B tries for goal......jpg

Click for large image

11_Carl_Rook.jpg

11 Carl Rook.jpg

Click for large image

12_Ryan_J_gets_fouled_on_the_edge_of_the_area.jpg

12 Ryan J gets fouled on the edge of the area.jpg

Click for large image

13_Elliot_controls_Adam_Flanagan_s_crossfield_ball_perfectly.....jpg

13 Elliot controls Adam Flanagan's crossfield ball perfectly.....jpg

Click for large image

14_...and_hits_it.....jpg

14 ...and hits it.....jpg

Click for large image

15_..the_keeper_is_beaten_1-0_Darts.jpg

15 ..the keeper is beaten 1-0 Darts.jpg

Click for large image

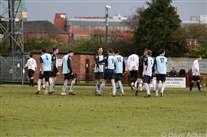
16_The_look_on_the_Boreham_Wood_players_says_it_all.jpg

16 The look on the Boreham Wood players says it all.jpg

Click for large image

17_A_minor_scare.......jpg

17 A minor scare.......jpg

Click for large image

18_...but_Andy_collects_safely.jpg

18 ...but Andy collects safely.jpg

Click for large image

19_Lee_challenges_for_the_ball.jpg

19 Lee challenges for the ball.jpg

Click for large image

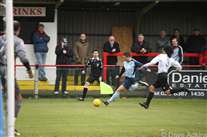
20_Carl_tries_to_get_there_before_the_keeper.jpg

20 Carl tries to get there before the keeper.jpg

Click for large image

21_...but_the_keeper_gets_there.jpg

21 ...but the keeper gets there.jpg

Click for large image

22_Elliot_crosses_the_ball.....jpg

22 Elliot crosses the ball.....jpg

Click for large image

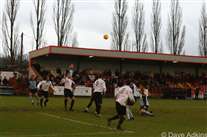
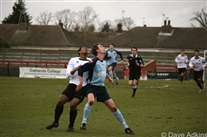
23_....Billy_gets_his_head_to_the_ball......jpg

23 ....Billy gets his head to the ball......jpg

Click for large image

24_...but_it_s_wide.jpg

24 ...but it's wide.jpg

Click for large image

25_Elliot_controls_the_ball_in_the_corner.jpg

25 Elliot controls the ball in the corner.jpg

Click for large image

26_Billy_needs_someone_to_come_closer.jpg

26 Billy needs someone to come closer.jpg

Click for large image

27_Adam_G_sends_the_ball_upfield......jpg

27 Adam G sends the ball upfield......jpg

Click for large image

28_...Elliot_heads_it_into_the_area....jpg

28 ...Elliot heads it into the area....jpg

Click for large image

29_...both_Danny_and_Carl_race_to_get_on_the_end_of_it.....jpg

29 ...both Danny and Carl race to get on the end of it.....jpg

Click for large image

30_..but_the_keeper_beats_both_of_them_to_it.jpg

30 ..but the keeper beats both of them to it.jpg

Click for large image

31_The_crowd_were_ugly.jpg

31 The crowd were ugly.jpg

Click for large image

32_Elliot_sees_his_shot_saved_by_the_keeper.jpg

32 Elliot sees his shot saved by the keeper.jpg

Click for large image

33_Carl_races_for_the_ball.jpg

33 Carl races for the ball.jpg

Click for large image

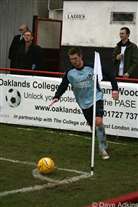
34_..he_even_has_time_to_check_where_everybody_is....jpg

34 ..he even has time to check where everybody is....jpg

Click for large image

35_..and_then_slams_on_the_brakes.....jpg

35 ..and then slams on the brakes.....jpg

Click for large image

36_Tiny_sends_the_cross_over.jpg

36 Tiny sends the cross over.jpg

Click for large image

37_Elliot_with_the_ball.jpg

37 Elliot with the ball.jpg

Click for large image

38_Lee_gets_on_the_end_of_Elliots_pass......jpg

38 Lee gets on the end of Elliots pass......jpg

Click for large image

39_...and_shoots.jpg

39 ...and shoots.jpg

Click for large image

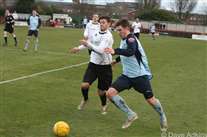
40_Tiny_keeps_the_Boreham_wood_skipper_under_pressure.jpg

40 Tiny keeps the Boreham wood skipper under pressure.jpg

Click for large image

41_Elliot_takes_the_corner.jpg

41 Elliot takes the corner.jpg

Click for large image

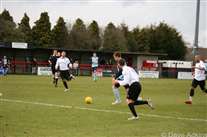
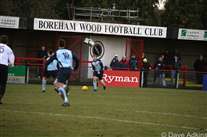
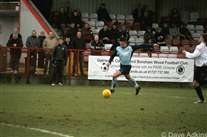
42_Carl_picks_the_ball_up_on_the_halfway_line.....jpg

42 Carl picks the ball up on the halfway line.....jpg

Click for large image

43_...Carl_at_full_throttle.....jpg

43 ...Carl at full throttle.....jpg

Click for large image

44_...a_tap_back_to_the_oncoming_Elliot....jpg

44 ...a tap back to the oncoming Elliot....jpg

Click for large image

45_...who_has_plenty_of_time....jpg

45 ...who has plenty of time....jpg

Click for large image

46_...to_take_on_the_Boreham_Wood_No6_before_being_piled_into_the_fencing.jpg

46 ...to take on the Boreham Wood No6 before being piled into the fencing.jpg

Click for large image

47_Get_out_of_the_way_ref.jpg

47 Get out of the way ref.jpg

Click for large image

48_Rob_climbs_high_above_the_defence.jpg

48 Rob climbs high above the defence.jpg

Click for large image

49_3pts_and_the_players_are_happy.jpg

49 3pts and the players are happy.jpg