Click for large image

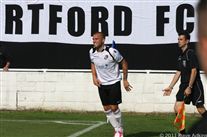
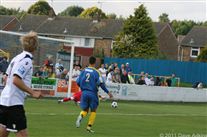
1_Deren_starts_his_first_game_of_the_season.jpg

1 Deren starts his first game of the season.jpg

Click for large image

2_Deren_is_called_into_action_early.jpg

2 Deren is called into action early.jpg

Click for large image

3_Charlie_Sheringham.jpg

3 Charlie Sheringham.jpg

Click for large image

4_The_balls_on_it_s_way......jpg

4 The balls on it's way......jpg

Click for large image

5_...and_Ryan_heads_the_ball.....jpg

5 ...and Ryan heads the ball.....jpg

Click for large image

6_...but_it_s_against_the_woodwork.jpg

6 ...but it's against the woodwork.jpg

Click for large image

7_Jon_clears.jpg

7 Jon clears.jpg

Click for large image

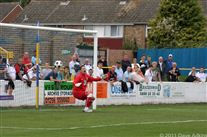
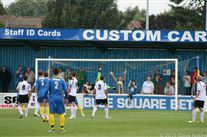
8_Charlie_is_held_as_he_is_through_-_Penalty.jpg

8 Charlie is held as he is through - Penalty.jpg

Click for large image

9_Charlie_takes_the_penalty.....jpg

9 Charlie takes the penalty.....jpg

Click for large image

10_...and_scores.....jpg

10 ...and scores.....jpg

Click for large image

11_...but_it_has_to_be_retaken.....jpg

11 ...but it has to be retaken.....jpg

Click for large image

12_...no_mistake_the_2nd_time_either_1-1.jpg

12 ...no mistake the 2nd time either 1-1.jpg

Click for large image

13_Charlie_celebrates.jpg

13 Charlie celebrates.jpg

Click for large image

14_Basingstoke_pressure.jpg

14 Basingstoke pressure.jpg

Click for large image

15_Adam_Green_shoots.....jpg

15 Adam Green shoots.....jpg

Click for large image

16_...forcing_the_keeper_full_length.jpg

16 ...forcing the keeper full length.jpg

Click for large image

17_Elliot_goes_for_the_ball.jpg

17 Elliot goes for the ball.jpg

Click for large image

18_Elliot_pushes_the_ball_out_wide......jpg

18 Elliot pushes the ball out wide......jpg

Click for large image

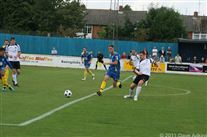
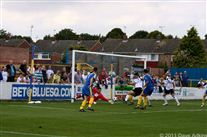
19_...for_Richard_to_cross_low_and_hard......jpg

19 ...for Richard to cross low and hard......jpg

Click for large image

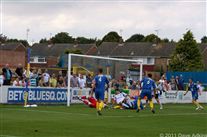
20_...but_Matt_is_unable_to_get_a_boot_to_it.jpg

20 ...but Matt is unable to get a boot to it.jpg

Click for large image

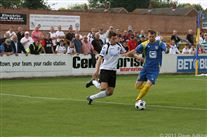
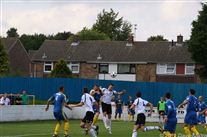
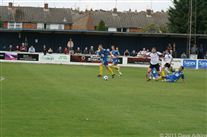
21_Once_again_Richard_finds_the_space_out_wide......jpg

21 Once again Richard finds the space out wide......jpg

Click for large image

22_...his_low_cross_into_Charlie.....jpg

22 ...his low cross into Charlie.....jpg

Click for large image

23_..but_somehow_the_keeper_manages_to_get_a_hand_to_it.jpg

23 ..but somehow the keeper manages to get a hand to it.jpg

Click for large image

24_Ryan_is_brought_down.....jpg

24 Ryan is brought down.....jpg

Click for large image

25_Adam_Green_takes_the_free-kick.....jpg

25 Adam Green takes the free-kick.....jpg

Click for large image

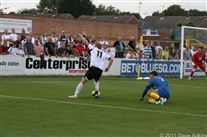
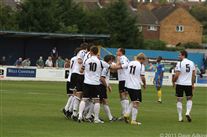
26_...and_it_s_deflected_past_the_keeper_2-1_Darts.jpg

26 ...and it's deflected past the keeper 2-1 Darts.jpg

Click for large image

27_Happy.jpg

27 Happy.jpg

Click for large image

28_A_free-kick_in_front_of_goal....jpg

28 A free-kick in front of goal....jpg

Click for large image

29_...over_the_wall.....jpg

29 ...over the wall.....jpg

Click for large image

30_...and_Deren_is_beaten_2-2.jpg

30 ...and Deren is beaten 2-2.jpg

Click for large image

31_Sustained_pressure_from_Basingstoke_as_Tom_heads_clear.jpg

31 Sustained pressure from Basingstoke as Tom heads clear.jpg

Click for large image

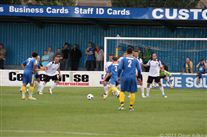
32_Ryan_is_clear_but_his_shot_is_blocked_by_the_keeper.jpg

32 Ryan is clear but his shot is blocked by the keeper.jpg

Click for large image

33_Tom_Champion.jpg

33 Tom Champion.jpg

Click for large image

34_Jon_Wallis.jpg

34 Jon Wallis.jpg

Click for large image

35_Elliot_Bradbook.jpg

35 Elliot Bradbook.jpg

Click for large image

36_Richard_Graham.jpg

36 Richard Graham.jpg

Click for large image

37_Tom_connects_with_Jon_s_corner.....jpg

37 Tom connects with Jon's corner.....jpg

Click for large image

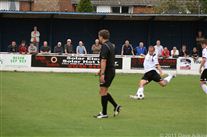
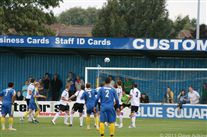
38_...but_it_is_Oh_So_close__as_the_reaction_behind_the_goal_shows.jpg

38 ...but it is Oh So close, as the reaction behind the goal shows.jpg

Click for large image

39_Matt_Jones.jpg

39 Matt Jones.jpg

Click for large image

40_Lee_Burns_is_denied.jpg

40 Lee Burns is denied.jpg

Click for large image

41_The_keeper_punches_clear.jpg

41 The keeper punches clear.jpg