
1_Adam_B_receives_pre-match_instructions_from_the_Boss.jpg
1 Adam B receives pre-match instructions from the Boss.jpg

2_Matchday_Mascots_with_the_2_Lees_and_Ryno.jpg
2 Matchday Mascots with the 2 Lees and Ryno.jpg

3_The_strike_pair_walk_off_together_after_pre-match_warm-up.jpg
3 The strike pair walk off together after pre-match warm-up.jpg
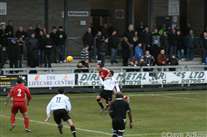
4_The_Carshalton_player_has_a_handful_of_Adam_s_shirt_in_front_of_the_Blind_ref.jpg
4 The Carshalton player has a handful of Adam's shirt in front of the Blind ref.jpg

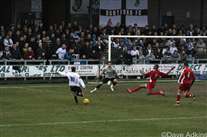
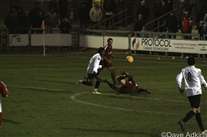
5_John_Beales_denies_Jolly_a_shooting_chance.jpg
5 John Beales denies Jolly a shooting chance.jpg

6_I_suppose_that_s_one_way_of_stopping_Tiny_jumping_-_a_bear_hug.jpg
6 I suppose that's one way of stopping Tiny jumping - a bear hug.jpg

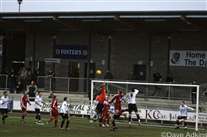
7_The_keeper_tips_Ryno_s_corner_over_the_bar.jpg
7 The keeper tips Ryno's corner over the bar.jpg


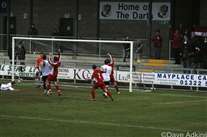
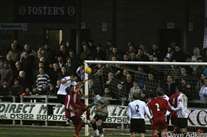
10_Rob_jumps_higher_than_the_Carshalton_players_to_head_the_corner_clear.jpg
10 Rob jumps higher than the Carshalton players to head the corner clear.jpg

11_The_Carshalton_No5_has_a_free_shot_but_puts_it_over_the_bar.jpg
11 The Carshalton No5 has a free shot but puts it over the bar.jpg

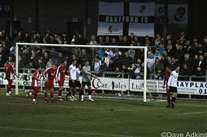
15_Ryno_sends_over_one_of_his_trademark_freekicks.......jpg
15 Ryno sends over one of his trademark freekicks.......jpg
16_...and_the_keeper_once_again_manages_to_get_a_hand_to_it.jpg
16 ...and the keeper once again manages to get a hand to it.jpg

17_Adam_B_looks_to_get_on_the_end_of_the_through_ball......jpg
17 Adam B looks to get on the end of the through ball......jpg

18_...but_the_defender_s_legs_are_bigger_than_Adam_s_and_he_gets_there_first.jpg
18 ...but the defender's legs are bigger than Adam's and he gets there first.jpg
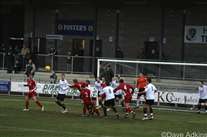
19_It_s_a_crowded_area_as_the_freekick_comes_in.....jpg
19 It's a crowded area as the freekick comes in.....jpg
21_...but_Danny_H_is_there_to_block_the_shot.jpg
21 ...but Danny H is there to block the shot.jpg
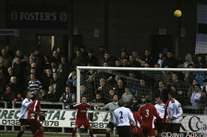
22_This_time_it_s_Andy_getting_a_hand_to_the_corner_to_push_it_away.jpg
22 This time it's Andy getting a hand to the corner to push it away.jpg

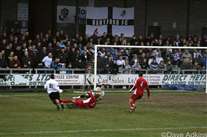
23_Jolly__on_left__gets_free_and_the_ball_ends_up_in_the_net_0-1_Carshalton.jpg
23 Jolly (on left) gets free and the ball ends up in the net 0-1 Carshalton.jpg
24_Andy_looks_crestfallen_as_the_Carshalton_players_celebrate.jpg
24 Andy looks crestfallen as the Carshalton players celebrate.jpg
26_...the_ball_comes_over_to_the_far_post_where_Jamie_C_is_waiting.....jpg
26 ...the ball comes over to the far post where Jamie C is waiting.....jpg

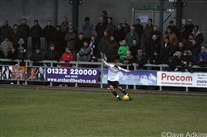
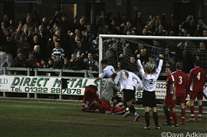
28_...the_ball_bulges_the_back_of_the_net_and_that_s_the_equaliser.jpg
28 ...the ball bulges the back of the net and that's the equaliser.jpg
29_Jamie_struggles_to_get_clear_to_celebrate.jpg
29 Jamie struggles to get clear to celebrate.jpg
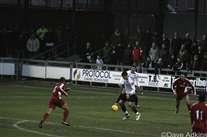
30_Rob_H_gets_the_ball_but_is_facing_away_from_goal.....jpg
30 Rob H gets the ball but is facing away from goal.....jpg

31_...but_still_manages_to_turn_and_shoot_-_inches_wide.jpg
31 ...but still manages to turn and shoot - inches wide.jpg


36_Adam_puts_the_ball_in_the_net_but_it_s_ruled_offside.jpg
36 Adam puts the ball in the net but it's ruled offside.jpg
38_...but_the_ball_bobbles_up_off_the_pitch.....jpg
38 ...but the ball bobbles up off the pitch.....jpg

39_...and_he_can_t_quite_get_over_it__it_s_over_the_bar.jpg
39 ...and he can't quite get over it, it's over the bar.jpg
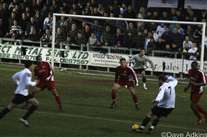
40_Danny_Crouch_fires_one_that_looked_goalbound_but_the_defender_manages_to_block_it.jpg
40 Danny Crouch fires one that looked goalbound but the defender manages to block it.jpg