Click for large image

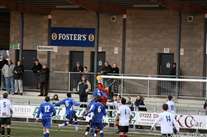
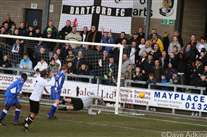
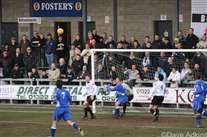
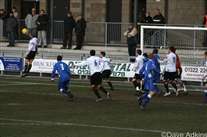
1_Almost_straight_from_the_kick_off_the_Darts_were_on_the_attack__Ryan_Johnson_tries_his_luck......jpg

1 Almost straight from the kick off the Darts were on the attack, Ryan Johnson tries his luck......jpg

Click for large image

2_Ryan_strikes_it_hard........jpg

2 Ryan strikes it hard........jpg

Click for large image

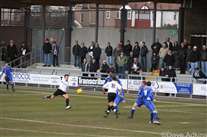
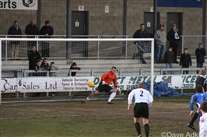
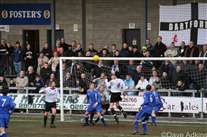
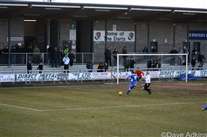
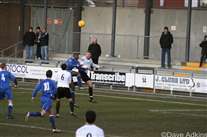
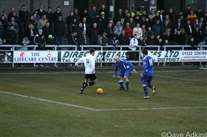
3_...the_keepers_beaten__but_it_s_inches_wide.....jpg

3 ...the keepers beaten, but it's inches wide.....jpg

Click for large image

4_....much_to_the_fans_dismay.jpg

4 ....much to the fans dismay.jpg

Click for large image

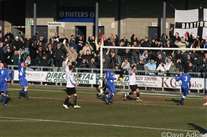
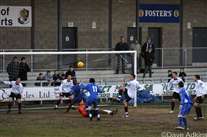
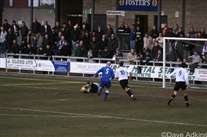
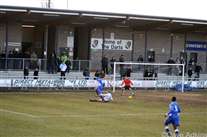
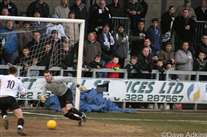
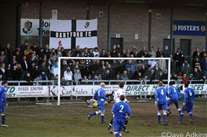
5_Andy_is_beaten_from_the_penalty_spot_1-0_Ashford.jpg

5 Andy is beaten from the penalty spot 1-0 Ashford.jpg

Click for large image

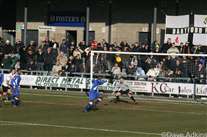
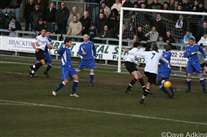
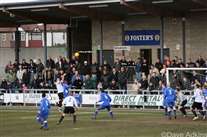
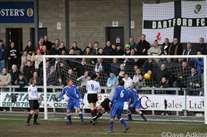
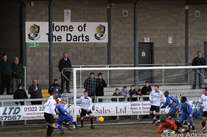
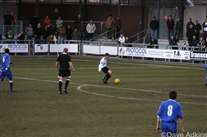
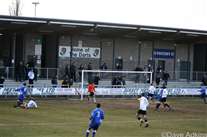
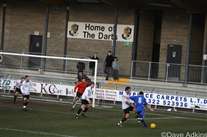
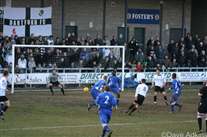
6_Ryan_s_free-kick_comes_in__no_pressure_for_the_Ashford_defender......jpg

6 Ryan's free-kick comes in, no pressure for the Ashford defender......jpg

Click for large image

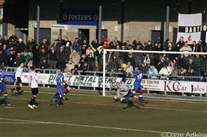
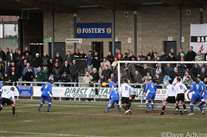
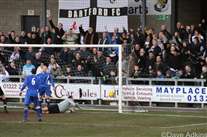
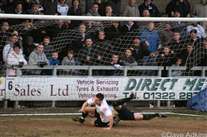
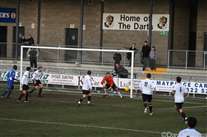
7_...I_ll_just_pop_it_into_the_back_of_the_net_1-1_o.g._.....jpg

7 ...I'll just pop it into the back of the net 1-1 o.g. .....jpg

Click for large image

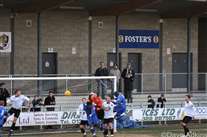
8_.....The_crowd_celebrate_-_the_player_wishes_there_was_a_hole_in_the_pitch.jpg

8 .....The crowd celebrate - the player wishes there was a hole in the pitch.jpg

Click for large image

9_The_Legend_that_is_Eddie_Mac.jpg

9 The Legend that is Eddie Mac.jpg

Click for large image

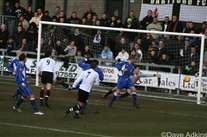
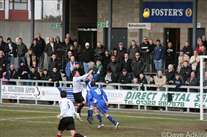
10_Adam_F_jumps_and_heads_the_ball_back_in......jpg

10 Adam F jumps and heads the ball back in......jpg

Click for large image

11_...but_the_no5_clears_before_Elliot_can_get_there.jpg

11 ...but the no5 clears before Elliot can get there.jpg

Click for large image

12_Elliot_jumps_for_the_ball.......jpg

12 Elliot jumps for the ball.......jpg

Click for large image

13_...the_ball_comes_into_the_area.......jpg

13 ...the ball comes into the area.......jpg

Click for large image

14_.....Danny_H_jumps.....jpg

14 .....Danny H jumps.....jpg

Click for large image

15_...and_guides_the_ball_into_the_net_2-1_Darts......jpg

15 ...and guides the ball into the net 2-1 Darts......jpg

Click for large image

16_Let_s_celebrate.jpg

16 Let's celebrate.jpg

Click for large image

17_Andy_palms_the_ball_over.jpg

17 Andy palms the ball over.jpg

Click for large image

18_Andy_punches_clear......jpg

18 Andy punches clear......jpg

Click for large image

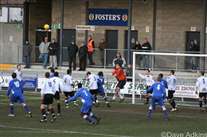
19_...but_the_Ashford_player_sends_it_back_in......jpg

19 ...but the Ashford player sends it back in......jpg

Click for large image

20_...but_Adam_F_clears_it.jpg

20 ...but Adam F clears it.jpg

Click for large image

21_Andy_is_forced_to_punch_again.jpg

21 Andy is forced to punch again.jpg

Click for large image

22_Lee_N_passes_to_Elliot......jpg

22 Lee N passes to Elliot......jpg

Click for large image

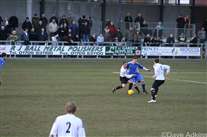
23_...who_flicks_the_ball_between_the_2_Ashford_players.......jpg

23 ...who flicks the ball between the 2 Ashford players.......jpg

Click for large image

24_...for_Lee_N_to_run_onto......jpg

24 ...for Lee N to run onto......jpg

Click for large image

25_....Lee_N_tries_to_place_it......jpg

25 ....Lee N tries to place it......jpg

Click for large image

26_..but_the_keeper_gets_there.jpg

26 ..but the keeper gets there.jpg

Click for large image

27_Andy_Young_at_full_stretch.jpg

27 Andy Young at full stretch.jpg

Click for large image

28_Eddie_Mac_and_Mark_Green_reminisce.jpg

28 Eddie Mac and Mark Green reminisce.jpg

Click for large image

29_Lee_N_tries_to_chip_the_keeper.......jpg

29 Lee N tries to chip the keeper.......jpg

Click for large image

30_....but_it_is_over_the_bar.jpg

30 ....but it is over the bar.jpg

Click for large image

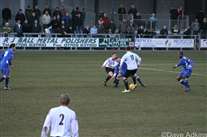
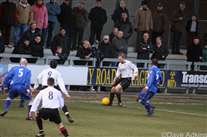
31_Billy_tries_to_get_to_the_Ashford_no_10......jpg

31 Billy tries to get to the Ashford no 10......jpg

Click for large image

32_...but_he_shoots......jpg

32 ...but he shoots......jpg

Click for large image

33_...and_scores_2-2.jpg

33 ...and scores 2-2.jpg

Click for large image

34_Billy_gets_to_the_goal_line_and_crosses.......jpg

34 Billy gets to the goal line and crosses.......jpg

Click for large image

35_...the_keeper_struggles_to_get_to_Lee_B......jpg

35 ...the keeper struggles to get to Lee B......jpg

Click for large image

36_...the_keeper_and_Lee_B_on_the_ground_but_the_ball_is_in_the_back_of_the_net_3-2_Darts.jpg

36 ...the keeper and Lee B on the ground but the ball is in the back of the net 3-2 Darts.jpg

Click for large image

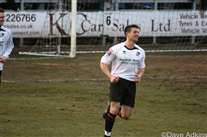
37_A_Happy_Lee_B__back_on_the_scoring_trail.jpg

37 A Happy Lee B, back on the scoring trail.jpg

Click for large image

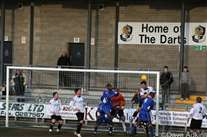
38_Adam_climbs_at_the_near_post_to_head_the_corner_clear.jpg

38 Adam climbs at the near post to head the corner clear.jpg

Click for large image

39_John_Beales__covering.jpg

39 John Beales' covering.jpg

Click for large image

40_Adam_F_with_a_timely_tackle_in_the_area.jpg

40 Adam F with a timely tackle in the area.jpg

Click for large image

41_Andy__collects_safely.jpg

41 Andy collects safely.jpg

Click for large image

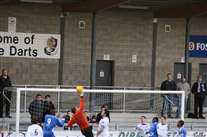
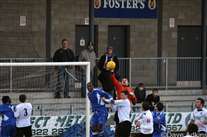
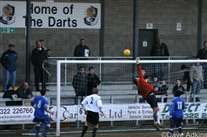
42_Andy_gets_height_and_distance_on_his_punch.jpg

42 Andy gets height and distance on his punch.jpg

Click for large image

43_Billy_heads_the_corner_away.jpg

43 Billy heads the corner away.jpg

Click for large image

44_Carl_hits_the_ball_low_across_the_area_......jpg

44 Carl hits the ball low across the area ......jpg

Click for large image

45_...for_Lee_N_to_hit_the_ball_low_and_hard.....jpg

45 ...for Lee N to hit the ball low and hard.....jpg

Click for large image

46_...but_the_keeper_gets_down_to_collect_the_ball..jpg

46 ...but the keeper gets down to collect the ball..jpg

Click for large image

47_Andy_collects.jpg

47 Andy collects.jpg