Click for large image

1_Happy_Birthday_Nicola.jpg

1 Happy Birthday Nicola.jpg

Click for large image

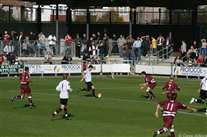
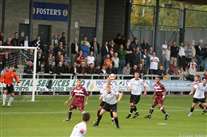
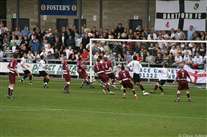
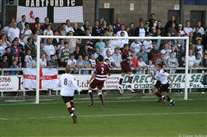
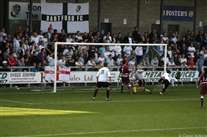
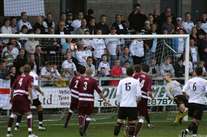
2_A_great_start_Elliot_lets_it_go_from_the_edge_of_the_area.....jpg

2 A great start Elliot lets it go from the edge of the area.....jpg

Click for large image

3_..only_to_see_it_go_wide.jpg

3 ..only to see it go wide.jpg

Click for large image

4_Lee_B_chases_for_the_ball....jpg

4 Lee B chases for the ball....jpg

Click for large image

5_...and_gets_it.....jpg

5 ...and gets it.....jpg

Click for large image

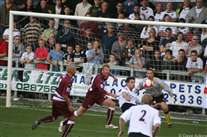
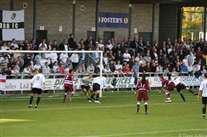
6_..Lee_N_looks_to_get_onto_the_end_of_Lee_s_pass......jpg

6 ..Lee N looks to get onto the end of Lee's pass......jpg

Click for large image

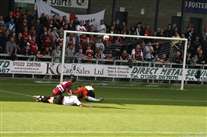
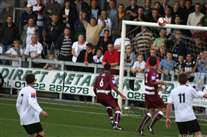
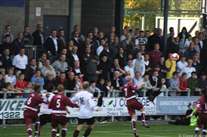
7_..but_he_ends_up_on_the_floor__falling_over__the_defenders_leg.jpg

7 ..but he ends up on the floor 'falling over' the defenders leg.jpg

Click for large image

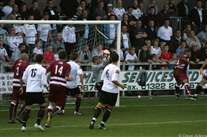
8_It_looks_like_a_useless_chase_for_Lee_B.....jpg

8 It looks like a useless chase for Lee B.....jpg

Click for large image

9_...but_he_somehow_manages_to_keep_the_ball_in.....jpg

9 ...but he somehow manages to keep the ball in.....jpg

Click for large image

10_...but_his_cross_to_Lee_N_is_cut_out.jpg

10 ...but his cross to Lee N is cut out.jpg

Click for large image

11_Jamie_Coyle_heads_clear.jpg

11 Jamie Coyle heads clear.jpg

Click for large image

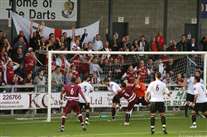
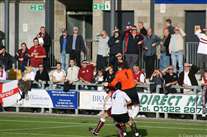
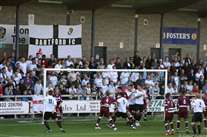
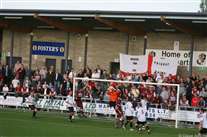
12_The_Vocal__for_a_change__Dartford_supporters.jpg

12 The Vocal (for a change) Dartford supporters.jpg

Click for large image

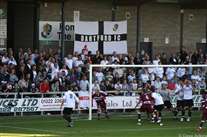
13_Nice_to_see_a_sizeable_contingent_of_away_support.jpg

13 Nice to see a sizeable contingent of away support.jpg

Click for large image

14_Tiny_uses_the__whole_body__approach.jpg

14 Tiny uses the 'whole body' approach.jpg

Click for large image

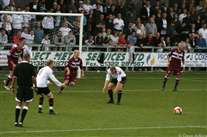
15_Lee_has_a_go_but_it_s_deflected_off_the_defender_for_a_corner.jpg

15 Lee has a go but it's deflected off the defender for a corner.jpg

Click for large image

16_A_determined_Adam_Flanagan.jpg

16 A determined Adam Flanagan.jpg

Click for large image

17_He_s_still_determined.jpg

17 He's still determined.jpg

Click for large image

18_Billy_s_turn_to_head_clear.jpg

18 Billy's turn to head clear.jpg

Click for large image

19_The_corner_is_flicked_on......jpg

19 The corner is flicked on......jpg

Click for large image

20_..it_falls_to_the_chelmsford_no9....jpg

20 ..it falls to the chelmsford no9....jpg

Click for large image

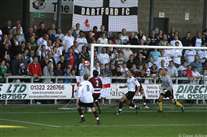
21_...who_s_first_attempt_is_cleared_off_the_line_by_Adam_Gross.....jpg

21 ...who's first attempt is cleared off the line by Adam Gross.....jpg

Click for large image

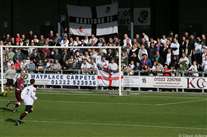
22_...but_he_cannot_do_anything_about_the_2nd_attempt_1-0_Chelmsford.jpg

22 ...but he cannot do anything about the 2nd attempt 1-0 Chelmsford.jpg

Click for large image

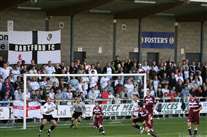
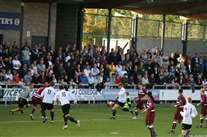
23_Chelmsford_s__Crouch-alike__races_clear_with_only_Andy_to_beat......jpg

23 Chelmsford's 'Crouch-alike' races clear with only Andy to beat......jpg

Click for large image

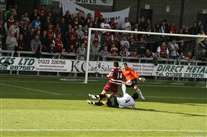
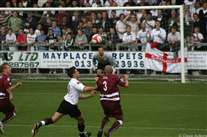
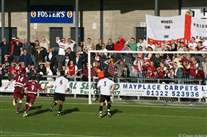
24_...Flans_gets_there_as_Andy_spreads_himself.....jpg

24 ...Flans gets there as Andy spreads himself.....jpg

Click for large image

25_...enough_to_block_the_shot.....jpg

25 ...enough to block the shot.....jpg

Click for large image

26_...the_loose_ball_bounces_but_Adam_and_Jamie_get_it_clear_between_them.jpg

26 ...the loose ball bounces but Adam and Jamie get it clear between them.jpg

Click for large image

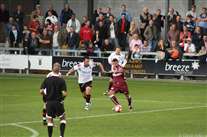
27_Jamie_Day_shoots_but_a_defender_gets_his_body_in_the_way.jpg

27 Jamie Day shoots but a defender gets his body in the way.jpg

Click for large image

28_Jamie_C_steadies_himself_before_sending_the_ball_over......jpg

28 Jamie C steadies himself before sending the ball over......jpg

Click for large image

29_..the_keeper_gets_above_Lee_B_and_palms_the_ball_away.jpg

29 ..the keeper gets above Lee B and palms the ball away.jpg

Click for large image

30_Billy_sends_the_ball_in.....jpg

30 Billy sends the ball in.....jpg

Click for large image

31_...but_it_finds_a_Chelmsford_head.jpg

31 ...but it finds a Chelmsford head.jpg

Click for large image

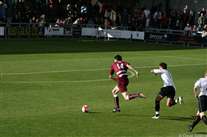
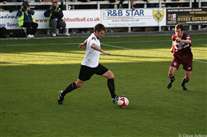
32_Lee_B_gets_clear_to_flick_the_ball_on......jpg

32 Lee B gets clear to flick the ball on......jpg

Click for large image

33_...but_the_keepers_reactions_are_good_and_he_pushes_it_wide.jpg

33 ...but the keepers reactions are good and he pushes it wide.jpg

Click for large image

34_Lee_B_goes_for_the_acrobatic_shot.....jpg

34 Lee B goes for the acrobatic shot.....jpg

Click for large image

35_..and_it_s_oh_so_close.jpg

35 ..and it's oh so close.jpg

Click for large image

36_All_change_time_to_put_the_flag_up_the_other_end.jpg

36 All change time to put the flag up the other end.jpg

Click for large image

37_Andy_jumps_to_punch_clear.jpg

37 Andy jumps to punch clear.jpg

Click for large image

38_Rob_heads_the_ball_back_across_goal_.....jpg

38 Rob heads the ball back across goal .....jpg

Click for large image

39_...everyone_watches_it.....jpg

39 ...everyone watches it.....jpg

Click for large image

40_...but_it_s_wide.jpg

40 ...but it's wide.jpg

Click for large image

41_Lee_watches_the_ball_before_heading_it_towards_the_goal.....jpg

41 Lee watches the ball before heading it towards the goal.....jpg

Click for large image

42_...forcing_the_keeper_to_punch_clear.jpg

42 ...forcing the keeper to punch clear.jpg

Click for large image

43_The_Freekick_beats_Andy_into_the_top_right_hand_corner.jpg

43 The Freekick beats Andy into the top right hand corner.jpg

Click for large image

44_The_ball_is_in_there_somewhere.......jpg

44 The ball is in there somewhere.......jpg

Click for large image

45_...but_Rob_s_reaction_says_it_all.jpg

45 ...but Rob's reaction says it all.jpg

Click for large image

46_Elliot_Bradbrook.jpg

46 Elliot Bradbrook.jpg

Click for large image

47_Allan__Tait__goes_for_goal_and_is_only_just_wide.jpg

47 Allan (Tait) goes for goal and is only just wide.jpg

Click for large image

48_...but_it_s_wide_-_again.jpg

48 ...but it's wide - again.jpg

Click for large image

48_Jay_gets_his_head_to_the_ball.....jpg

48 Jay gets his head to the ball.....jpg

Click for large image

49_The_ball_comes_in_from_Ryno.....jpg

49 The ball comes in from Ryno.....jpg

Click for large image

50_...Adam__Flans__header_beats_the_keeper.....jpg

50 ...Adam (Flans) header beats the keeper.....jpg

Click for large image

51_...into_the_roof_of_the_net_goal_Darts.jpg

51 ...into the roof of the net goal Darts.jpg

Click for large image

52_Who_s_saying_what_to_who.jpg

52 Who's saying what to who.jpg

Click for large image

53_Billy_launches_one.jpg

53 Billy launches one.jpg

Click for large image

54_Andy_has_to_jump__but_collects_it_clearly.jpg

54 Andy has to jump, but collects it clearly.jpg